

Calisthenics has taken the fitness world by storm—and for good reason. Using bodyweight exercises, you can sculpt your body, increase strength, improve flexibility, and boost endurance without relying on expensive machines. Among the most effective tools for calisthenics enthusiasts are handstand bars. These compact, portable bars elevate your training, protect your wrists, and make advanced exercises safer and more accessible.
Whether your goal is to master handstands, perform planches, or build core strength, handstand bars are indispensable. This comprehensive guide will cover everything you need to know about calisthenics handstand bars, including exercises, benefits, tips, FAQs, mistakes to avoid, and how to choose the best bars for your home or gym.
What Are Calisthenics Handstand Bars?
Handstand bars are small, sturdy bars designed to lift your hands off the ground while performing exercises such as handstands, push-ups, planches, and L-sits. Unlike performing exercises directly on the floor, handstand bars help improve stability, reduce wrist strain, and allow for a greater range of motion. For more tips on building strength and muscle effectively, check out our Calisthenics for Muscle Growth
- Reduce wrist strain by keeping your wrists in a neutral position.
- Improve grip stability, which is critical for advanced calisthenics moves.
- Allow for longer, safer practice sessions.
- Help beginners and advanced athletes alike practice balance and control.
Most handstand bars are made from high-quality steel or aluminum and feature non-slip handles. Some are even foldable or portable, making them perfect for home workouts, park sessions, or travel.
Why Use Handstand Bars in Calisthenics?
Handstand bars aren’t just for handstands—they’re a versatile tool that enhances your entire calisthenics routine. They improve balance, strength, and control across exercises. For additional upper body strength, don’t miss our Dumbbell Exercises for Shoulders guide to complement your training.
1. Protect Your Wrists
Performing handstands or planche progressions directly on the floor can put significant pressure on your wrists. Handstand bars keep wrists straight, reduce strain, and prevent injuries.
2. Build Upper Body Strength
Handstand bars increase the range of motion for push-ups and planche progressions, engaging your shoulders, chest, arms, and core more effectively than floor exercises. For targeted chest development, check out our Best Exercise for Bottom of Chest
3. Improve Balance and Control
Practicing handstands on bars helps you focus on balance without fear of slipping. You can gradually increase hold times and develop stability over time.
4. Versatility in Training
Handstand bars aren’t just for handstands—they’re ideal for:
- L-sits
- Push-ups with deeper range
- Planche progressions
- Tuck handstands
- Wrist strengthening exercises
5. Progression-Friendly
Beginners can use bars for wall-supported handstands, while advanced athletes can attempt complex moves like planche push-ups or freestanding handstands safely. To build stronger arms for these moves, check out our Dumbbell for Arms Workout
Top Exercises With Handstand Bars
Here are the most effective exercises you can do with handstand bars, including step-by-step instructions:
1. Handstand Hold
Muscles targeted: Shoulders, triceps, core
How to perform:
- Place the handstand bars shoulder-width apart on a flat, stable surface.
- Grip the handles firmly.
- Kick up into a handstand against a wall for support if needed.
- Keep your arms straight, shoulders engaged, and core tight.
- Hold for 10–60 seconds depending on your skill level.
Tip: Beginners can practice for 3–5 sets with 15–30 seconds per hold and gradually increase duration. For stronger back support during these exercises, check out our Back Exercises with Dumbbells guide.
2. L-Sit
Muscles targeted: Core, hip flexors, triceps
How to perform:
- Sit on the floor with handstand bars on either side.
- Place your hands on the bars and lift your body off the ground.
- Extend your legs straight in front of you, forming an “L” shape.
- Hold for 10–20 seconds initially, gradually increasing over time.
Tip: If your hamstrings are tight, you can bend your knees slightly at first. For a complete routine that strengthens every muscle, check out our Full Body Calisthenics Exercises guide.
3. Planche Progression
Muscles targeted: Chest, shoulders, core
How to perform:
- Place bars shoulder-width apart.
- Grip bars firmly and lean forward while keeping your arms straight.
- Lift your legs off the ground in a tuck planche position.
- Hold as long as possible while maintaining core engagement.
Tip: Start with tuck planche or frog planche before progressing to a full planche. For a complete step-by-step routine, check out our Calisthenics Workout Plan Free guide.
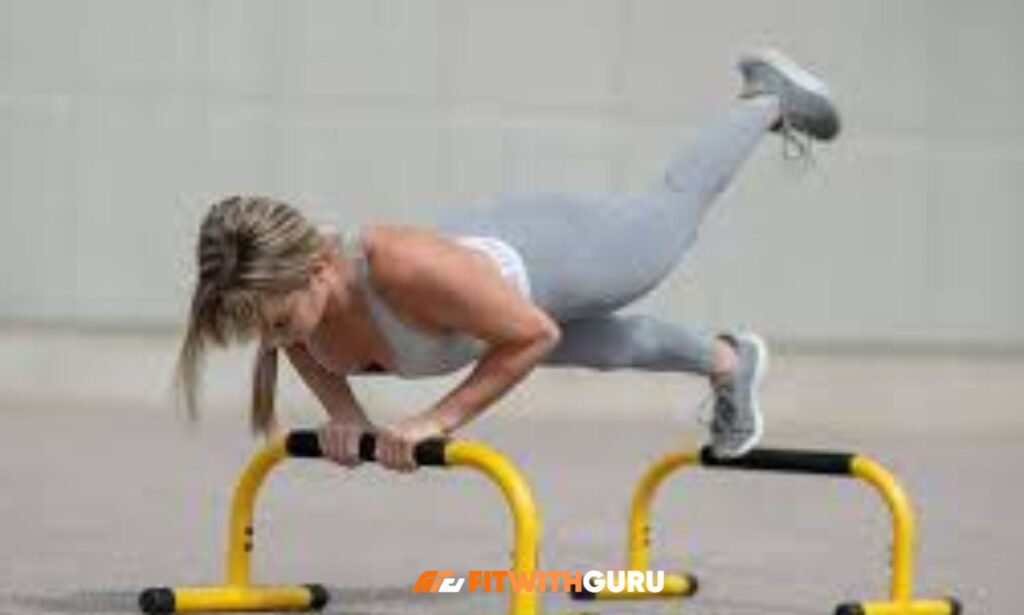
4. Elevated Push-Ups
Muscles targeted: Chest, shoulders, triceps
How to perform:
- Place your hands on the bars and assume a push-up position.
- Lower your chest between the bars while keeping elbows at a 45° angle.
- Push back up to the starting position.
Tip: Using bars increases the range of motion, making your push-ups more effective. For a structured approach, check out our Men’s Calisthenics Workout Plan to boost strength and performance.
5. Tuck Handstand
Muscles targeted: Core, shoulders, arms
How to perform:
- Begin in a handstand hold on the bars.
- Slowly tuck your knees toward your chest.
- Hold for 10–20 seconds, focusing on balance and control.
Tip: Keep your shoulders active and core tight to maintain stability. For a full calisthenics routine to strengthen your entire body, check out our Calisthenics Exercises Routine guide.
How to Choose the Best Calisthenics Handstand Bars
Choosing the right handstand bars is crucial for safety and performance. Consider these factors:
1. Material Quality
Steel and aluminum bars are durable, rust-resistant, and capable of supporting heavy weights. Avoid low-quality plastic bars—they may bend or break under pressure. For tips on combining calisthenics with fat loss, check out our Is Calisthenics Good for Weight Loss? guide.
2. Handle Grip
Foam or rubber handles prevent slipping and improve comfort during long sessions.
3. Height and Width
Select bars that match your height and arm span. Adjustable or medium-height bars are ideal for most exercises.
4. Weight Capacity
Ensure the bars can support your body weight plus any dynamic movement (at least 100–150 kg recommended).
5. Portability
Foldable and lightweight bars are easier to store and transport, perfect for home gyms or outdoor workouts. To create a full-body routine you can do anywhere, check out our Calisthenics Exercises Routine guide.
Tips to Maximize Your Handstand Bar Training
1. Warm Up Thoroughly
Before using handstand bars, always warm up your wrists, shoulders, and core. Try wrist circles, shoulder rotations, cat-cow stretches, and plank holds for 5–10 minutes. This prepares your joints, prevents injuries, and improves your performance. To learn more about calisthenics fundamentals, check out our What is Calisthenics? guide.
2. Progress Gradually
Start with wall-supported handstands or tuck holds before moving to freestanding handstands. Gradually increase the time you hold each position and progress to more advanced moves like L-sits and planches. Patience is key—rushing can lead to injuries.
3. Engage Your Core
Your core is the foundation of all calisthenics movements. Tighten your abs, glutes, and lower back during every exercise. Engaging the core not only improves balance but also allows you to perform advanced moves safely and effectively. To take your training to the next level, try our 28-Day Calisthenics Challenge Free for a full-body program.
4. Maintain Shoulder Activation
Keep your shoulders active, slightly shrugged, and stable during all handstand bar exercises. Proper shoulder engagement prevents collapsing, supports your wrists, and makes handstands and planches easier to hold.
5. Consistency is Key
Practice 2–4 times per week for the best results. Regular training builds strength, balance, and confidence over time. Keep a training log to track your progress and gradually increase difficulty and duration. For a structured approach, check out our Calisthenics Workout Schedule to plan your sessions effectively.
6. Focus on Controlled Movements
Avoid rushing through exercises. Move slowly and deliberately, especially for L-sits, tuck handstands, and planche progressions. Controlled movements increase muscle activation, improve balance, and reduce the risk of falls.
7. Incorporate Flexibility & Mobility Work
Flexibility in your shoulders, wrists, and hamstrings improves technique and prevents injuries. Add shoulder stretches, wrist extensions, and hamstring mobility exercises to your routine after each session. For combining strength and muscle growth, check out our Calisthenics Bodybuilding guide.
8. Use Proper Breathing
Breathing is often overlooked. Inhale during lowering movements and exhale while lifting or holding. Proper breathing improves endurance, reduces tension, and helps maintain balance.
9. Track Your Progress
Record your exercises, hold times, and repetitions. Tracking progress keeps you motivated and ensures continuous improvement. You can also use video to analyze form and correct mistakes. For a complete reference, check out our Calisthenics Exercises List to track and expand your routine.
10. Rest & Recover
Allow your muscles to recover between sessions. Rest days are essential for growth, strength gains, and preventing overuse injuries. Combine rest with light mobility or stretching for optimal recovery.
Common Mistakes to Avoid
- Neglecting Wrist Warm-Up – Even with bars, cold wrists can get injured.
- Overtraining – Avoid daily high-intensity handstand training; muscles need time to recover.
- Poor Grip – A weak grip can lead to slips or injuries.
- Ignoring Core Engagement – Balance and control depend on tight core muscles.
- Skipping Progression Steps – Jumping to advanced moves too quickly increases injury risk.
- Incorrect Hand Placement – Placing hands too close or too far apart reduces stability and increases the chance of tipping.
- Not Engaging the Shoulders – Relaxed shoulders lower control, making handstands and L-sits harder and unsafe.
- Neglecting Recovery & Stretching – Not stretching shoulders, wrists, and forearms after training can lead to stiffness or long-term injuries.
FAQs
Q1: Are handstand bars suitable for beginners?
Yes! Calisthenics handstand bars provide a stable base and reduce wrist strain, making it easier for beginners to learn handstands, L-sits, and other bodyweight exercises safely. To build stronger arms for these moves, check out our Calisthenic Bicep Workout guide.
Q2: How often should I train with handstand bars?
Training 2–4 times per week is ideal. This balance allows your wrists, shoulders, and core to recover while making consistent progress in strength and balance.
Q3: Can I use handstand bars for advanced exercises like planches?
Absolutely! Handstand bars are perfect for planche progressions, tuck planches, and planche push-ups, providing stability and reducing wrist strain while building core and upper body strength. For advanced routines, check out our Advanced Calisthenics Workout guide.
Q4: Are handstand bars portable and easy to store?
Yes. Many models are lightweight, foldable, and compact, making them easy to carry, store, or take to outdoor workouts without hassle.
Q5: Do handstand bars help prevent wrist injuries?
Yes. They keep your wrists in a neutral position, reducing strain and improving wrist strength over time, which is crucial for safe handstand and bodyweight training. For a full program to build strength progressively, try our 90-Day Calisthenics Challenge
Conclusion
Calisthenics handstand bars are more than just exercise equipment—they’re your ticket to mastering advanced bodyweight skills, building upper body strength, and improving balance. From handstands and L-sits to planches, bars provide safety, stability, and progression opportunities for all skill levels.
💪 Ready to take your calisthenics journey to the next level?
Don’t wait! Get your premium handstand bars today and start building strength, balance, and confidence with every workout.
With consistent practice, you’ll see faster progress, improved control, and the ability to perform advanced moves you never thought possible. Transform your workouts and unlock your full potential. Make every session count and elevate your calisthenics game starting today! For building strength and muscle efficiently, check out our Calisthenics for Muscle Growth guide.