

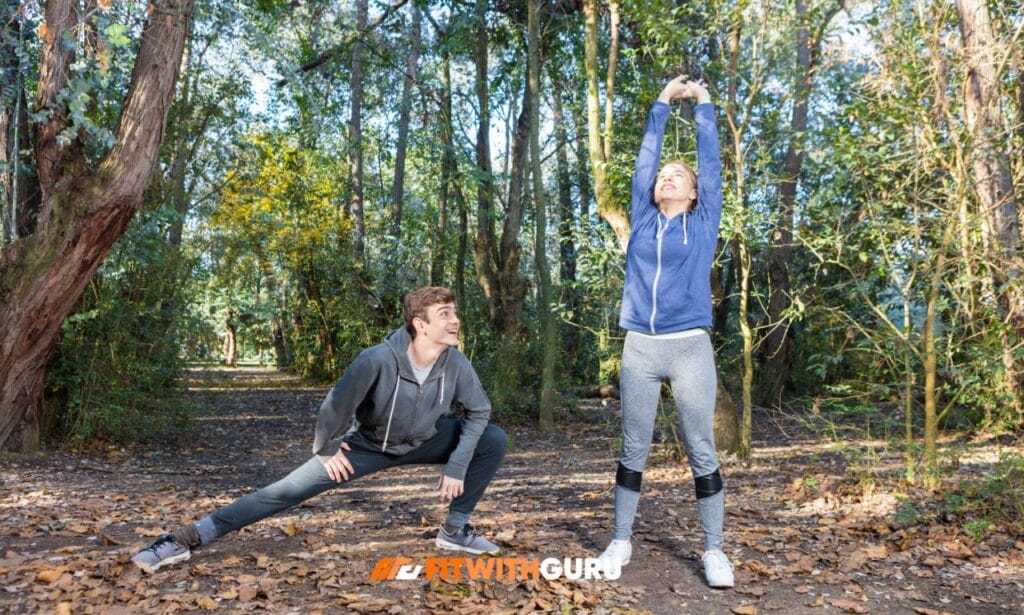
Hiking strength training transforms your trail experience from a grueling endurance test into an enjoyable adventure where you feel powerful and confident with every step.
Whether you’re planning to tackle the Appalachian Trail or simply want to conquer that challenging local peak without your legs feeling like jelly, specific strength training for hiking makes all the difference.
Why Traditional Gym Workouts Fall Short for Hiking Strength Training
Most gym routines focus on isolated muscle movements that don’t translate well to the complex, multi-planar movements required on trails.
Hiking strength training demands functional movements that mirror the exact muscle patterns you’ll use when navigating uneven terrain, steep ascents, and challenging descents.
Traditional weightlifting creates strength in predictable, controlled environments. Trails throw curveballs at every turn – loose rocks, steep grades, uneven surfaces, and shifting loads.
Effective hiking strength training prepares your muscles, joints, and nervous system for these real-world challenges.
The Science Behind Hiking-Specific Movement Patterns
Research from the Journal of Sports Medicine shows that hikers benefit most from exercises that combine stability, strength, and endurance in movement patterns specific to their activity.
Hiking strength training should emphasize:
- Unilateral (single-leg) movements that improve balance and prevent compensation patterns
- Multi-planar exercises that strengthen muscles in all directions of movement
- Functional core stability that supports your spine under load
- Progressive overload that builds both strength and muscular endurance
The Complete Hiking Strength Training Foundation
Before diving into specific workouts, understanding the fundamental movement patterns essential for hiking strength training sets you up for success.
Every step on a trail involves complex coordination between your legs, core, and upper body. Your lead leg must generate enough force to propel your body weight (plus pack weight) upward while your trailing leg provides stability and control.
Effective hiking strength training addresses each of these components through progressive, challenging exercises that build real-world strength.
Building Your Hiking Strength Training Base
Start with bodyweight movements before adding external resistance. Your body needs to master basic movement patterns with perfect form before handling additional load.
Focus on movement quality over quantity during your initial weeks of hiking strength training. Poor movement patterns under load lead to injury and inefficient hiking mechanics.
Workout #1: The Mountain Climber’s Power Foundation
This hiking strength training workout builds the explosive lower body power needed for steep ascents and the eccentric control required for safe descents.
1. Bulgarian Split Squats (3 sets x 12-15 each leg)
How to Perform:
Place your rear foot on a bench or chair behind you • Position yourself so your front thigh reaches parallel to the ground at the bottom • Keep your torso upright with core engaged • Lower slowly for 3 seconds, controlling the descent • Drive up explosively through your front heel • Avoid pushing off with your rear foot
This exercise perfectly mimics the single-leg strength demands of hiking while building unilateral stability.
Exercise 2: Step-Ups with Knee Drive (3 sets x 10-12 each leg)
How to Perform:
- Use a box or bench that brings your thigh parallel to the ground
- Step up with one foot, placing your entire foot on the surface
- Drive through your heel to lift your body weight
- Bring your opposite knee toward your chest at the top
- Step down slowly with control, resisting gravity
- Complete all reps on one leg before switching
Exercise 3: Single-Leg Deadlifts (3 sets x 8-10 each leg)
How to Perform:
- Stand on one leg with a slight bend in your knee
- Hinge at your hip while extending your free leg behind you
- Keep your back straight and core engaged
- Lower until you feel a stretch in your hamstring
- Return to standing by driving your hip forward
- Maintain balance throughout the entire movement
Workout #2: Core Stability for Heavy Pack Loads
Your core acts as your body’s natural weight belt during hiking, transferring forces between your upper and lower body while maintaining spinal alignment under load.
Exercise 1: Loaded Carries (3 sets x 30-45 seconds)
How to Perform:
- Hold weights in both hands (farmer’s walk) or one hand (suitcase carry)
- Keep your shoulders back and down
- Maintain perfect posture throughout the walk
- Take controlled steps without swaying side to side
- Breathe normally while walking
- Focus on keeping your core tight and engaged
Exercise 2: Plank Variations with Movement (3 sets x 30-45 seconds each)
How to Perform:
- Start in a standard plank position with forearms down
- Keep your body in a straight line from head to heels
- Add arm reaches by extending one arm forward
- Perform leg lifts by raising one foot off the ground
- Execute mountain climbers by bringing knees to chest alternately
- Maintain core stability throughout all movements
Exercise 3: Bird Dogs with Resistance (3 sets x 8-10 each side)
How to Perform:
- Start on hands and knees with neutral spine
- Extend opposite arm and leg simultaneously
- Hold for 2-3 seconds at full extension
- Keep your hips level and avoid rotating
- Add resistance band between hand and foot for challenge
- Focus on quality over speed
| Week | Load | Duration | Complexity |
| 1-2 | Bodyweight | 30 seconds | Basic positions |
| 3-4 | Light weight | 45 seconds | Add movement |
| 5-6 | Moderate weight | 60 seconds | Multi-planar |
| 7-8 | Heavy/unstable | 45-60 seconds | Sport-specific |
Workout #3: Downhill Control and Knee Protection
Descents require exceptional eccentric strength to control your body weight plus pack load against gravity.
Exercise 1: Reverse Lunges with Pause (3 sets x 12-15 each leg)
How to Perform:
- Step backward into a lunge position
- Lower until both knees are at 90-degree angles
- Pause for 2-3 seconds at the bottom position
- Keep your front knee aligned over your ankle
- Push through your front heel to return to standing
- Maintain upright torso throughout the movement
Exercise 2: Eccentric Calf Raises (3 sets x 15-20)
How to Perform:
- Rise up on your toes using both feet
- Transfer weight to one foot at the top position
- Lower down slowly on one foot over 5-6 seconds
- Use both feet to rise back up
- Focus on controlling the lowering phase
- Switch legs for each repetition or complete sets per leg
Exercise 3: Wall Sits with Single-Leg Extension (3 sets x 30-45 seconds)
How to Perform:
- Sit against a wall with thighs parallel to the ground
- Keep your back flat against the wall
- Extend one leg straight out for 5 seconds
- Return foot to ground and extend opposite leg
- Maintain wall sit position throughout
- Keep your core engaged and breathing steady
This hiking strength training routine builds functional upper body strength that directly translates to better trail performance.
Workout #4: Functional Upper Body Power for Trail Navigation
Exercise 1: Push-Up Variations on Unstable Surfaces (3 sets x 8-12)
How to Perform:
- Place hands on stability ball, BOSU, or suspension trainer
- Maintain plank position with core engaged
- Lower chest toward unstable surface with control
- Push up explosively while maintaining balance
- Keep body in straight line throughout movement
- Progress by increasing instability or range of motion
Exercise 2: Single-Arm Rows with Rotation (3 sets x 10-12 each arm)
How to Perform:
- Use cable machine, resistance band, or dumbbell
- Start with arm extended and torso facing forward
- Pull weight back while rotating torso away from anchor
- Squeeze shoulder blade back at end of movement
- Return to starting position with control
- Keep core engaged throughout rotation
Exercise 3: Farmer’s Walk with Pack Simulation (3 sets x 30-45 seconds)
How to Perform:
- Wear a weighted backpack (start with 15-20 lbs)
- Carry weights in both hands
- Walk with perfect posture and controlled steps
- Keep shoulders back and core engaged
- Maintain steady breathing pattern
- Gradually increase pack weight over time
Workout #5: Explosive Power for Technical Terrain
Technical hiking requires quick, powerful movements to navigate obstacles and maintain momentum on challenging terrain.
Exercise 1: Lateral Bounds (3 sets x 6-8 each direction)
How to Perform:
- Start in athletic stance with slight knee bend
- Jump laterally from one foot to the other
- Land softly on outside foot with control
- Pause briefly before exploding to next bound
- Focus on distance and controlled landings
- Keep chest up and core engaged throughout
Exercise 2: Box Jump Step-Downs (3 sets x 5-8 each leg)
How to Perform:
- Jump onto box with both feet simultaneously
- Land softly with knees slightly bent
- Step down slowly with one leg, controlling descent
- Keep most weight on box leg during step-down
- Alternate which leg steps down first
- Focus on eccentric control during descent
Exercise 3: Medicine Ball Slams with Rotation (3 sets x 8-10 each direction)
How to Perform:
- Hold medicine ball at chest level
- Rotate torso and slam ball down beside hip
- Use full-body power generation
- Pick up ball and repeat on opposite side
- Keep core engaged throughout movement
- Focus on explosive power, not just arm strength
Advanced Hiking Strength Training Strategies
Once you’ve mastered the basic movements, advanced strategies help you break through plateaus.
Periodization for Hiking Seasons
Structure your hiking strength training around your planned hiking season. Build general strength during off-season months, then transition to hiking-specific training as your season approaches.
Pack Weight Simulation
Gradually incorporate pack weight into your hiking strength training routine. Start with 10-15% of your planned pack weight and increase by 5-10 pounds every 2-3 weeks.
Training Frequency and Recovery
Optimal hiking strength training frequency:
Beginner: 2-3 sessions per week with full rest days between sessions Intermediate: 3-4 sessions per week with at least one full rest day Advanced: 4-5 sessions per week with strategic periodization

Common Hiking Strength Training Mistakes to Avoid
Mistake #1: Ignoring Single-Leg Strength
Many hikers focus exclusively on bilateral exercises like squats and deadlifts. Hiking is predominantly a single-leg activity requiring unilateral strength and stability.
Mistake #2: Overemphasizing Mirror Muscles
Hiking performance depends more heavily on posterior chain muscles – glutes, hamstrings, lats, and rhomboids. Balance your routine by emphasizing pulling exercises and posterior chain development.
Mistake #3: Neglecting Movement Quality for Heavy Loads
Progressive overload is important, but not at the expense of movement quality. Always prioritize perfect technique over lifting heavy weights in your hiking strength training routine.
Form Cues for Perfect Hiking Strength Training Technique
Squatting Movements:
- Initiate movement by pushing hips back
- Keep chest up and spine neutral
- Knees track over middle toes
- Weight distributed across entire foot
Single-Leg Exercises:
- Maintain level hips throughout movement
- Keep knee aligned over ankle
- Engage core to prevent compensation
- Control both lifting and lowering phases
Equipment Recommendations for Home-Based Hiking Strength Training
Essential Equipment
- Resistance Bands Set: Provides variable resistance for upper and lower body exercises
- Suspension Trainer: Enables hundreds of bodyweight exercises with infinite scalability
- Adjustable Step Platform: Perfect for step-ups, lateral steps, and plyometric exercises
- Medicine Ball: Develops power, core strength, and functional movement patterns
Equipment-Free Hiking Strength Training Options
Even without equipment, you can perform effective hiking strength training:
- Use stairs for step-ups and calf raises
- Perform single-leg squats to a chair for depth consistency
- Use a backpack filled with books for added resistance
- Find hills or bleachers for incline training
Frequently Asked Questions
How often should I do hiking strength training?
For optimal results, perform hiking strength training 2-3 times per week with at least one rest day between sessions. Beginners should start with 2 sessions per week and gradually increase frequency as their recovery capacity improves.
The key is consistency over intensity – regular, moderate training sessions produce better long-term results than sporadic, intense workouts.
How long before a big hike should I start strength training?
Begin your hiking strength training routine at least 8-12 weeks before a major hiking trip. This timeframe allows your body to adapt progressively without rushing the process or risking injury.
Start with general strength and movement quality, then progress to hiking-specific exercises as your trip approaches.
Can hiking strength training replace cardio for hiking preparation?
While hiking strength training provides some cardiovascular benefits, it cannot completely replace aerobic conditioning for hiking preparation.
Effective hiking preparation requires both strength and cardiovascular fitness components. Aim for 2-3 hiking strength training sessions and 2-3 cardiovascular training sessions per week.
Should I train differently for day hikes versus multi-day backpacking?
Yes, multi-day backpacking requires additional considerations in your hiking strength training routine. Extended trips with heavy packs demand greater muscular endurance, core stability, and load-carrying capacity.
For day hiking, focus on power, agility, and moderate load tolerance. For backpacking, emphasize muscular endurance, postural strength, and progressive pack weight simulation.
What should I do if I experience pain during hiking strength training?
Stop the exercise immediately if you experience sharp, shooting, or sudden onset pain during hiking strength training. This type of pain typically indicates potential injury and requires professional evaluation.
Mild muscle fatigue and delayed onset muscle soreness (DOMS) are normal responses to progressive hiking strength training.
Conclusion
Hiking strength training transforms your trail experience from survival to thrival. The five workouts outlined in this guide provide a comprehensive foundation for building the strength, power, and stability needed to tackle any trail with confidence.
Remember that consistency trumps intensity in hiking strength training. Start with exercises appropriate for your current fitness level and progress gradually over time.
Whether you’re preparing for your first challenging day hike or training for a multi-week expedition, these hiking strength training principles and workouts will serve you well. Focus on movement quality, progressive overload, and recovery to maximize your results. The trail is calling, and with proper hiking strength training, you’ll be ready to answer with strength and confidence.